- 02 January 2017
- Mathieu Einig
In our previous article, we explained the basics of the PowerVR ray tracing API, including the scene generation and ray handling. In this article, we will show how to put those rays to good use to render different effects and compare the results with their rasterised counterpart.
The video below is Ray Factory, our latest hybrid rendering demo:
Better rendering with hybrid ray tracing
Shading a pixel is essentially about figuring out its context: where it is in the world, where the light is coming from, if the light is blocked by other surfaces or bouncing off them, etc. Rasterisers are not particularly good at determining this, as each triangle is treated independently from the rest. There are obviously ways to work around this problem to some extent, but these can be needlessly convoluted, of limited efficiency, and will often result in mediocre image quality. Ray tracers, on the other hand, are extremely good at figuring out what the surroundings are, but tend to be quite a lot slower due to a much higher computational complexity. A hybrid renderer can combine the speed of the rasteriser and the context awareness of the ray tracers by rasterising a G-buffer representing all the visible surfaces, before using its ray-tracing capabilities to compute the lighting and reflections for those surfaces.
Shadows
Handling shadows in a rasteriser is far from intuitive and does require quite a bit of logistics: the scene has to be rendered from the point of view of each light, stored in a texture, and then re-projected onto itself during the lighting stage. Even worse, doing so is far from being even remotely acceptable in terms of quality: those shadows are very prone to aliasing (because a pixel seen by the light does not correspond to a pixel seen by the camera), or acne (because a shadowmap texel stores a single depth value but can cover a large area). Furthermore, most rasterisers need to support specialised shadow map ‘types’, such as cubemapped shadows (for omnidirectional lights), or cascaded shadows maps (for large outdoor scenes), which considerably increase the complexity of the renderer.
In a ray tracer, a single code path can handle all the shadowing scenarios. More importantly, the shadowing process is as simple and intuitive as firing a ray from the surface towards the light source and checking if anything was hit on the way. The PowerVR ray-tracing architecture exposes fast ‘feeler’ rays that only check for the presence of geometry along the ray, which makes them particularly suitable for efficient shadow rendering.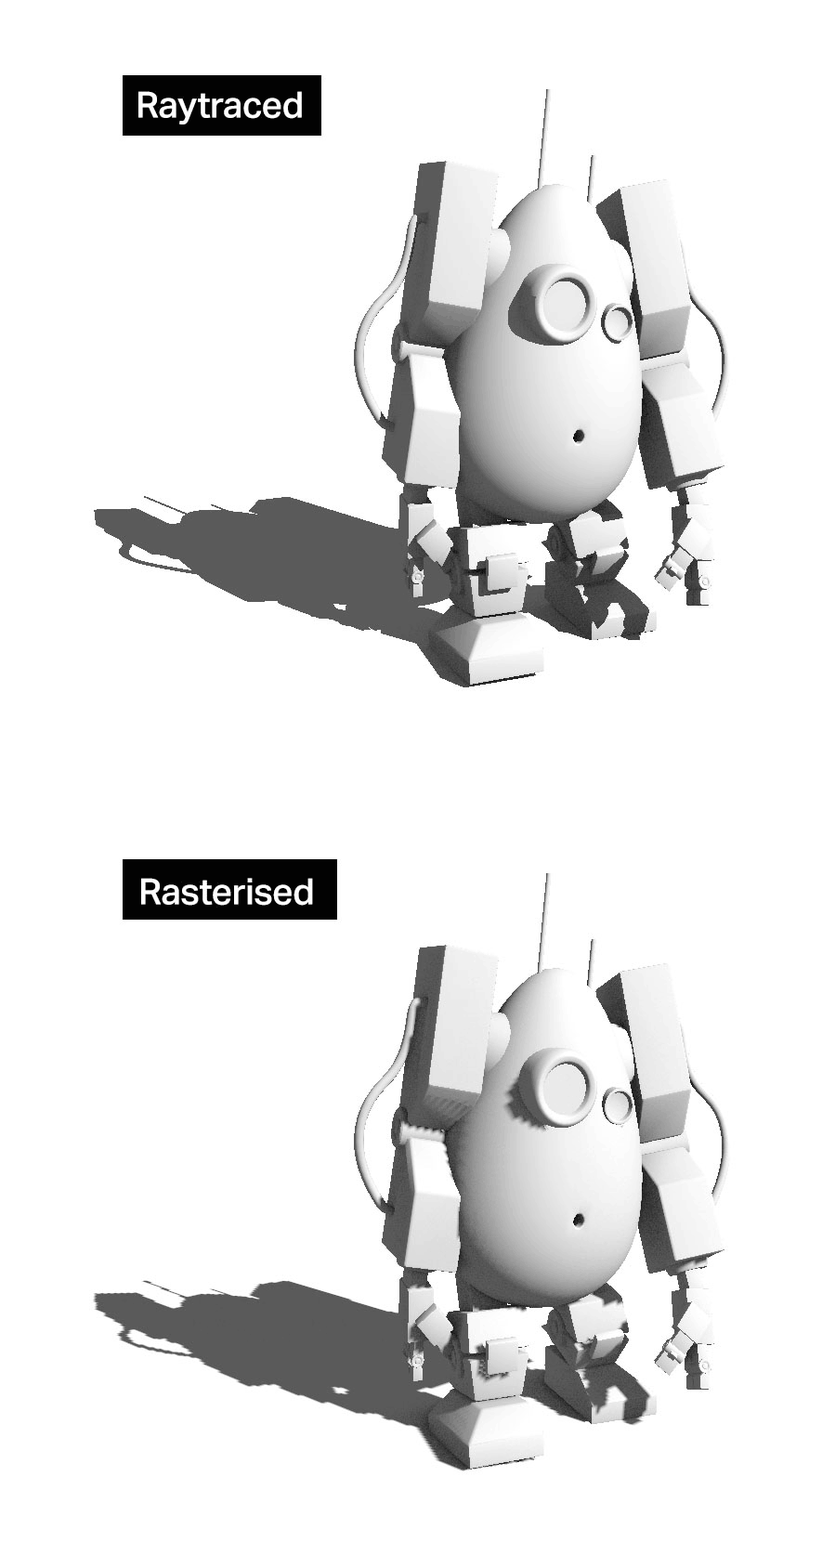
Pixel-perfect shadows might be clean, but they are still not exactly appealing, so the next step is to give them a nice and soft penumbra. Once again, the process is very intuitive and logical: penumbra is caused by light sources being surfaces rather than infinitely small points. Instead of firing a single ray towards that point, we can fire several rays towards random points on that light surface and average the results. The larger the surface, the larger the penumbra, and the more rays we will need for an acceptable image.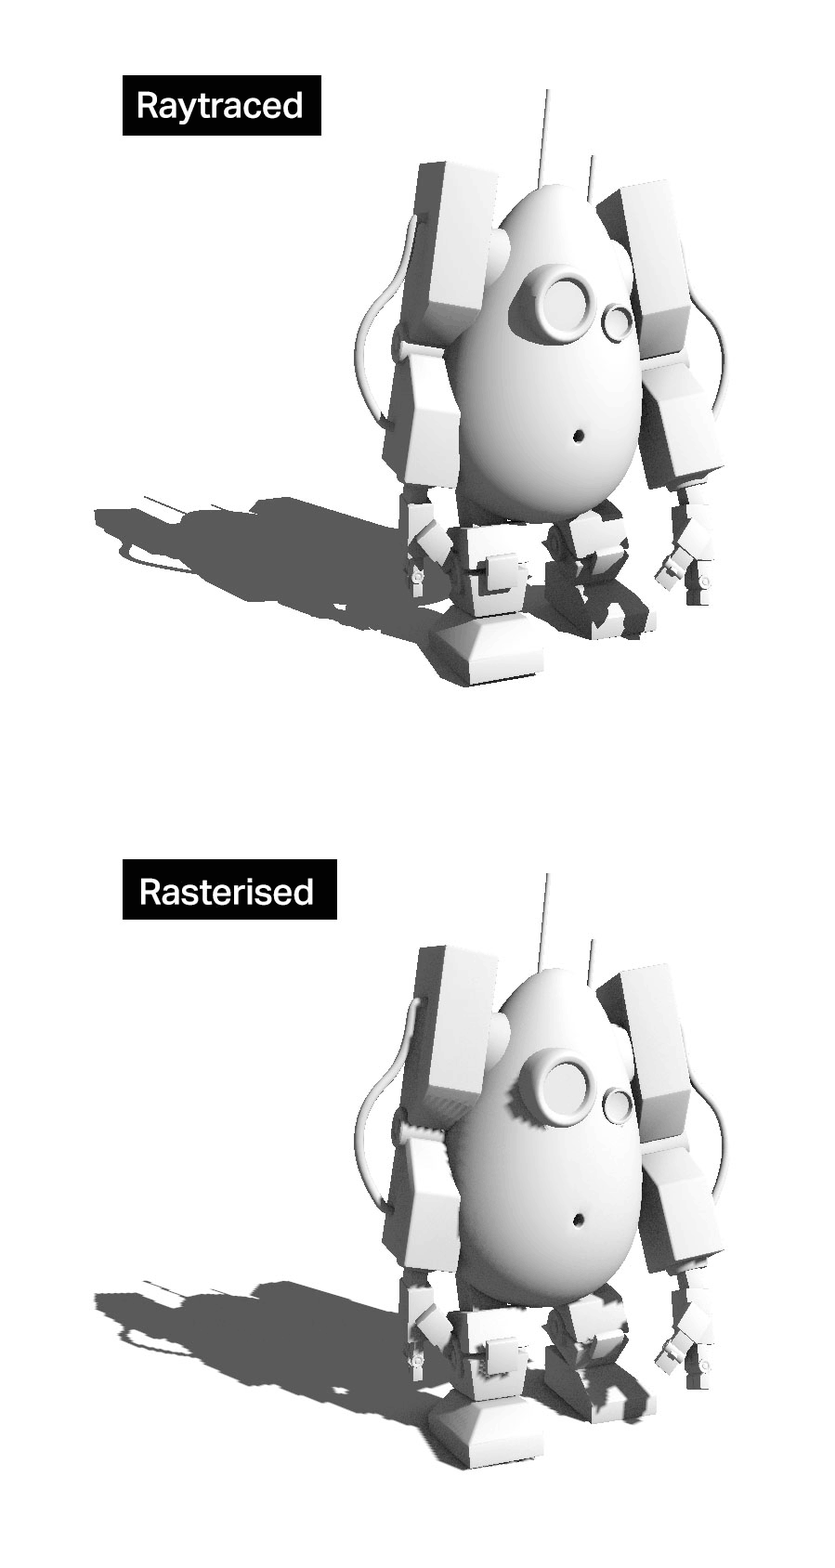
This is obviously a very naïve approach, but it has the merit of being extremely simple to implement. Better results can be achieved with more advanced methods, as described in our previous blog post: Implementing fast, ray traced soft shadows in a game engine.
Just like penumbrae, shadow translucency is not something that could easily be added to a rasteriser, especially when it comes to supporting multiple layers of translucent materials. In ray tracing, it is once again a very simple process: when a shadow ray hits a surface, check how opaque the surface is, and then reduce the ray intensity by that amount.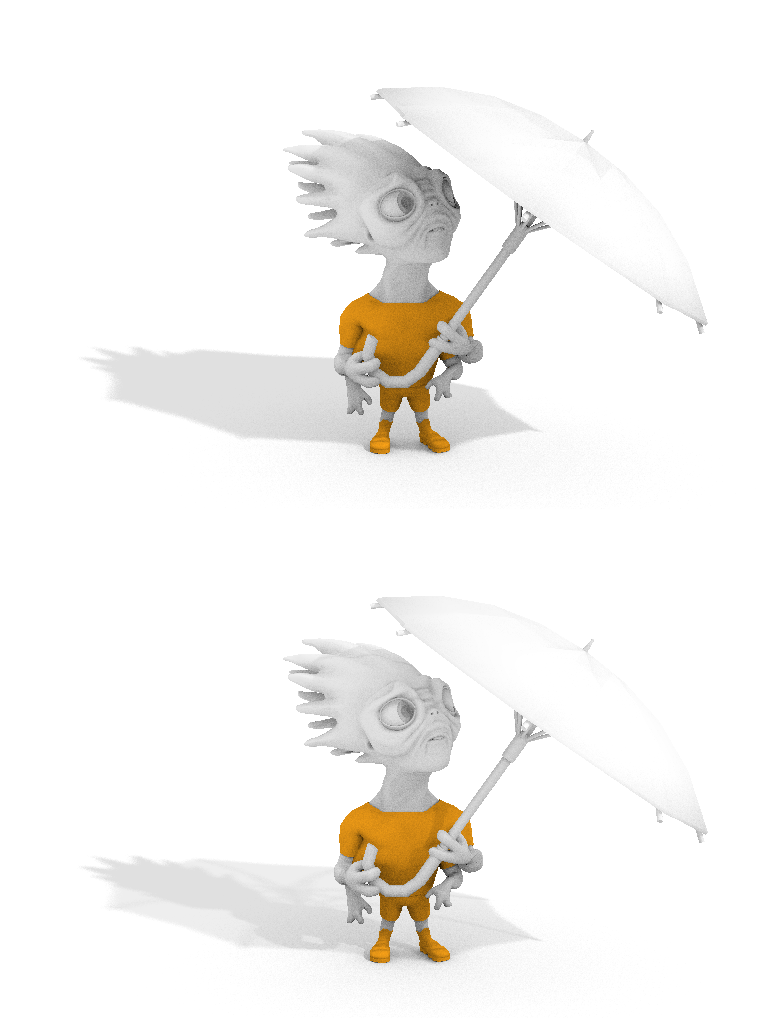
Ambient occlusion
Ambient occlusion (AO) can be seen as the shadow of an infinite dome light and is therefore implemented in a very similar way to soft shadows. Rays are fired across a hemisphere aligned with the surface, and some amount of light is accumulated if no geometry is hit. Because the lighting from the whole hemisphere has to be integrated, special care must be taken when choosing a sampling method. In this specific example, we fed a 2D Halton sequence to a cosine lobe sampler, which produced visually pleasing results.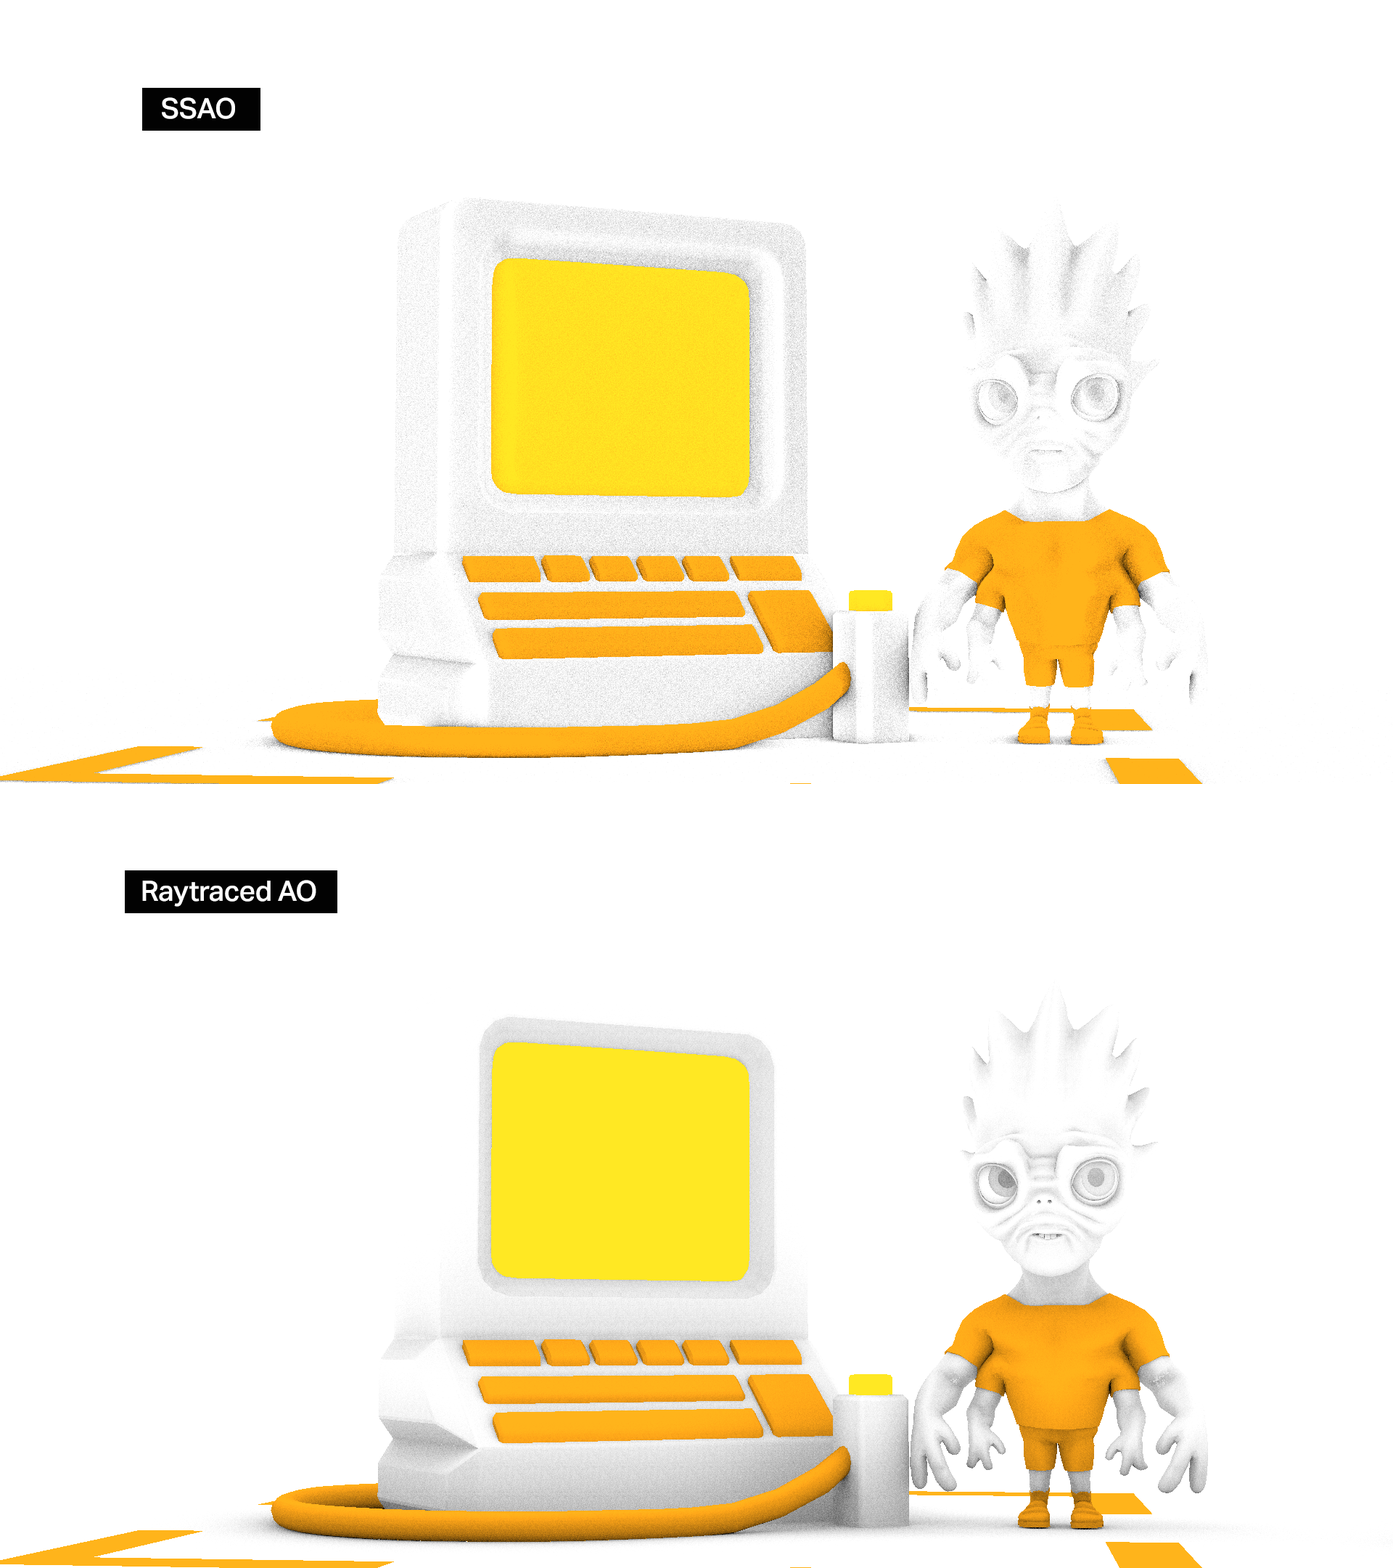
Ambient occlusion is not something that can easily be achieved with rasterization alone. Current state of the art methods usually entail either approximating it in screen space and disregarding much of the third dimension, or building a volumetric representation of the scene and essentially emulating ray tracing in a shader.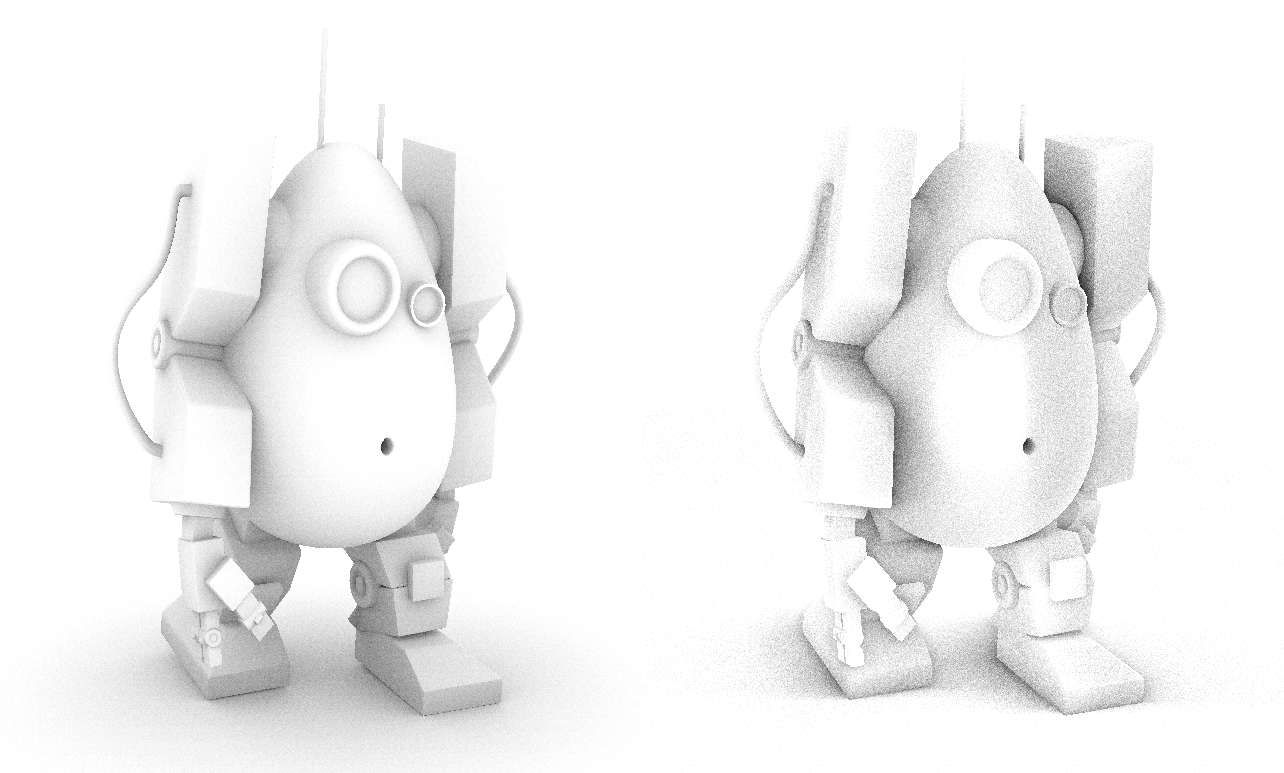
Global illumination
Global illumination (GI) is essentially the opposite of ambient occlusion, but can be implemented as a simple extension of an AO renderer. Instead of accumulating light when a ray does not hit anything, it accumulates some of the light coming from the surface it hits. In practice, this means that fast ‘feeler’ rays can no longer be used and must be replaced with full rays that will find the nearest surface intersections, and then evaluate the lighting at this point.
In this specific case, we use both single-bounce GI and AO, which, although physically dubious at best, is aesthetically pleasing and results in images close to pre-rendered quality.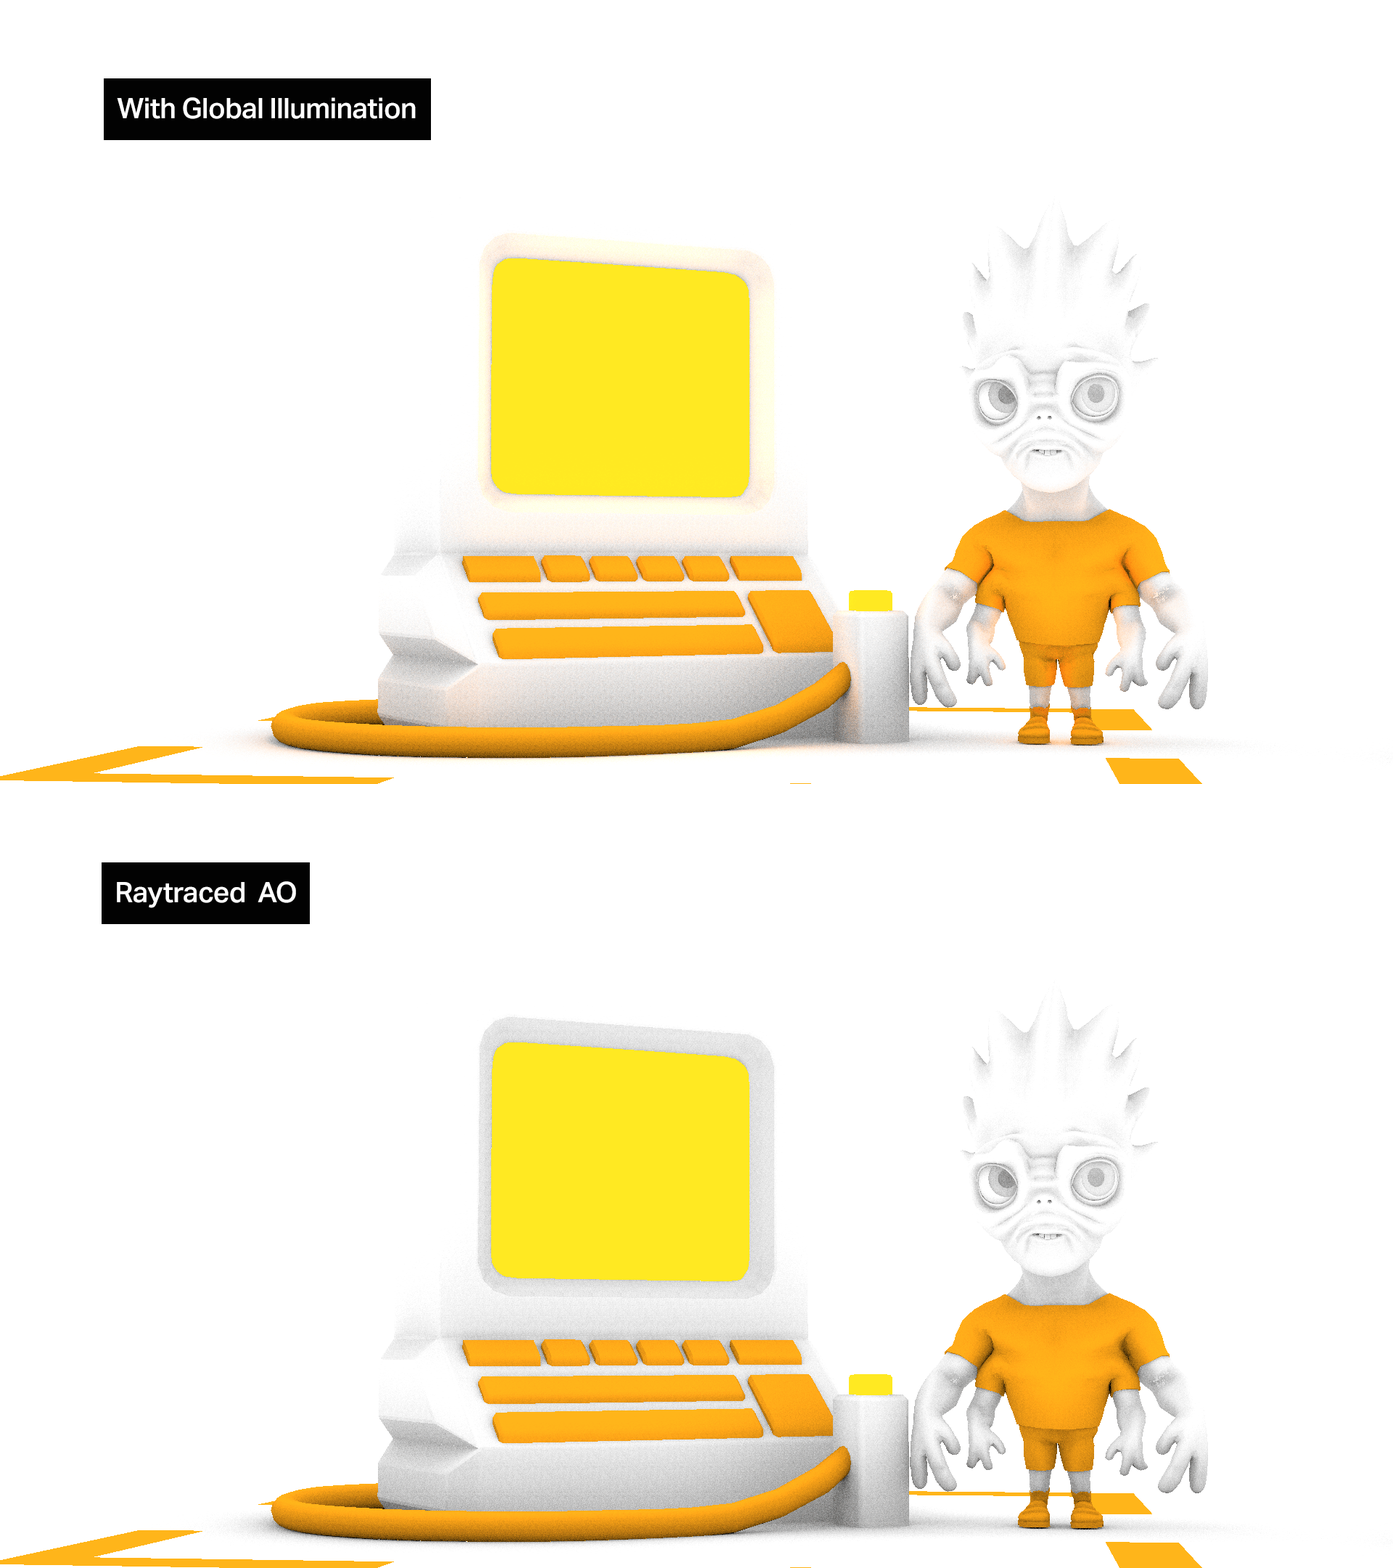
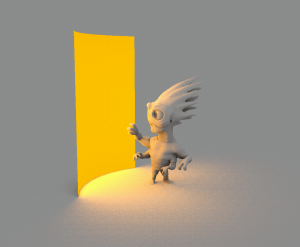
Adding support for emissive surfaces to such system is trivial and any piece of geometry can be turned into an area light that can be perfectly integrated into the scene. Area lights have still not been solved in the rasterised world: they are generally limited to simple shapes and do not cast shadows, making difficult to use in real scenarios.
Optimisations
While using a hybrid approach has saved us quite a lot of computation compared to a fully ray traced renderer, complex effects on large scenes are still expensive, and every effort must be made to achieve the best performance.
Our Ray Factory demo runs at 30 frames per second at 1080p on a PowerVR GR6500 GPU, firing on average more than 100 million rays per second. The cost of the different ray traced lighting effects in a typical frame is detailed in the table below:
| Shadows | AO | AO/GI | All | |
| Effect render time (ms) | 2.36 | 4.16 | 4.76 | 7.12 |
Unsurprisingly, the Ambient Occlusion is quite a lot more expensive than simple shadows, due to the large amount of rays needed. Similarly, when the AO sampler is extended to support Global Illumination, extra computations are needed to find the nearest surface and evaluate its lighting.
Temporal super-sampling
In most cases, two consecutive frames will be extremely similar: some surfaces may have moved a little, but they are still the same surfaces that were rendered previously. Costly shading operations can therefore be reused from one frame to the next as long as a mapping between a pixel and its previous position can be established. This method has become very popular in real-time graphics and has been used to improve anti-aliasing, SSAO, screen-space reflections, etc. It essentially reduces the number of rays needed per frame by spreading them over several frames.
Temporal super-sampling only needs access to the previous frame and per-pixel motion vectors. Thanks to the tile-based architecture of PowerVR GPUs, rendering those extra motion vectors can be done extremely efficiently without requiring extra bandwidth, through the use of the Pixel Local Storage extension.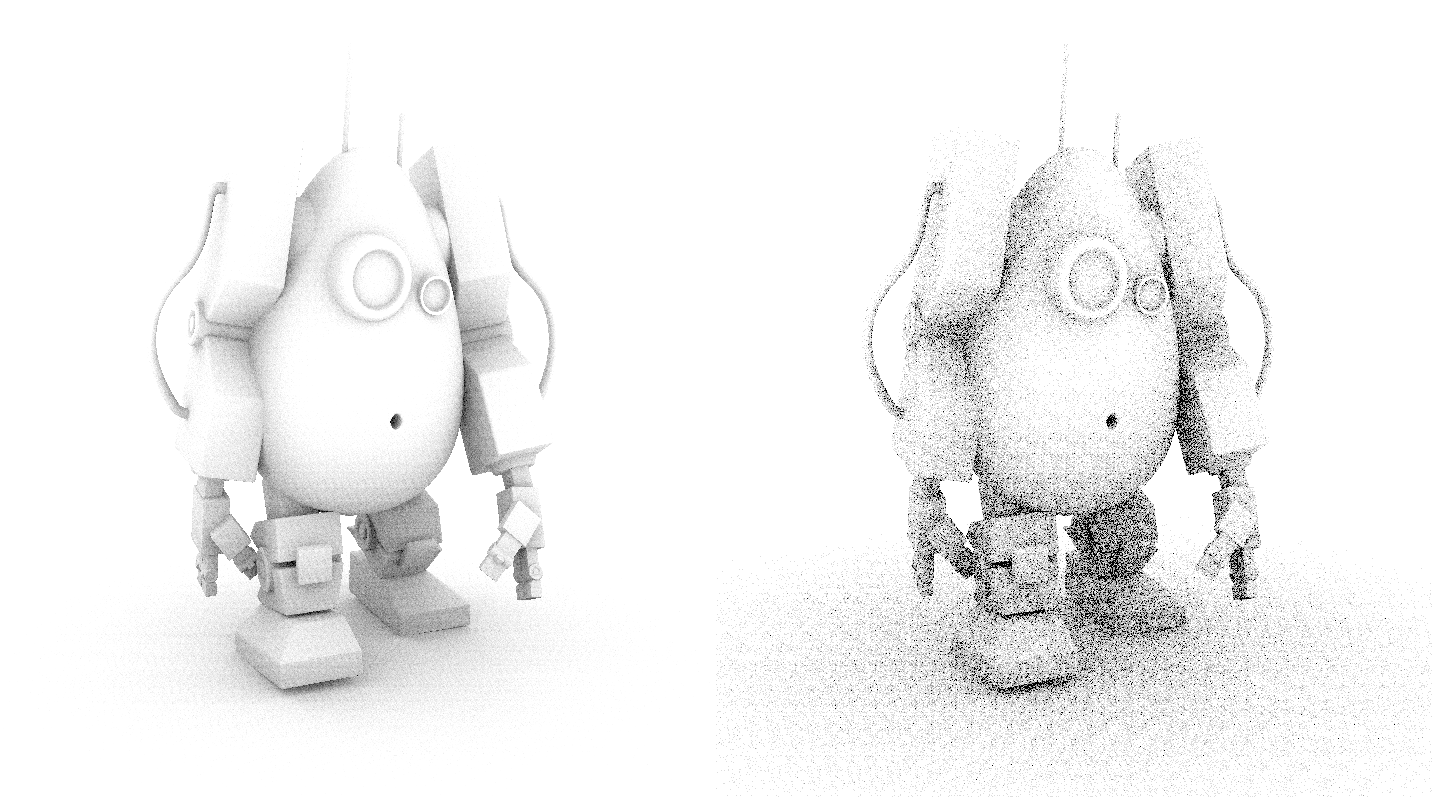
Although it improves the lighting quality substantially (or reduces the number of rays, depending on how you look at it), it does tend to create temporal artifacts. For example, shadow trails can be seen behind moving objects.
Better scene management
The Scene Hierarchy Generation (SHG) is where a lot of the ray tracing magic happens: the vertex shaders run over the scene geometry, and the resulting triangles are stored into an acceleration structure that makes real-time ray tracing possible. As the scene grows, this task can take a substantial amount of our frame render time: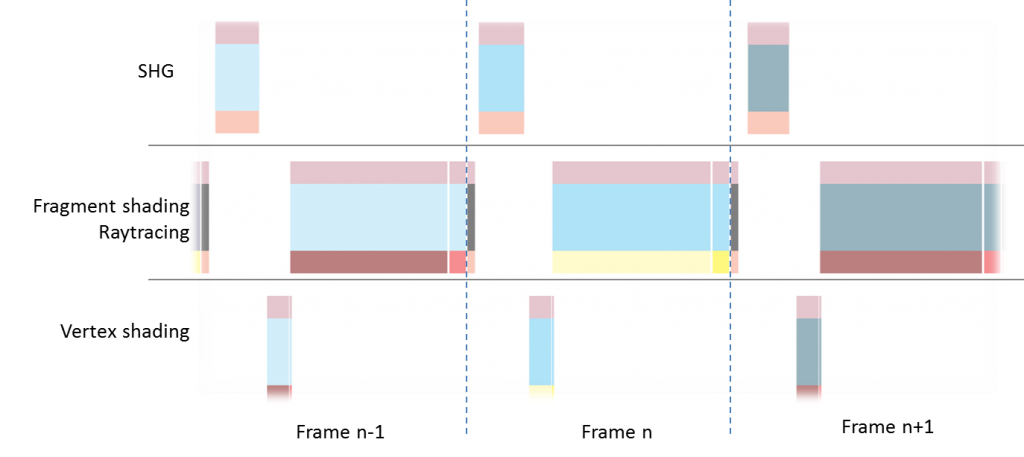
Fortunately, the SHG can be run in parallel with the main render, meaning that by the time our current frame has finished rendering, the geometry for the next frame will be ready, which substantially reduces the perceived frame processing time. This however requires the scene to be multi-buffered so that one copy can be modified whilst the other is used for rendering. Anyone who has started developing for Vulkan, or tried optimising OpenGL renderers, should be familiar with such a method.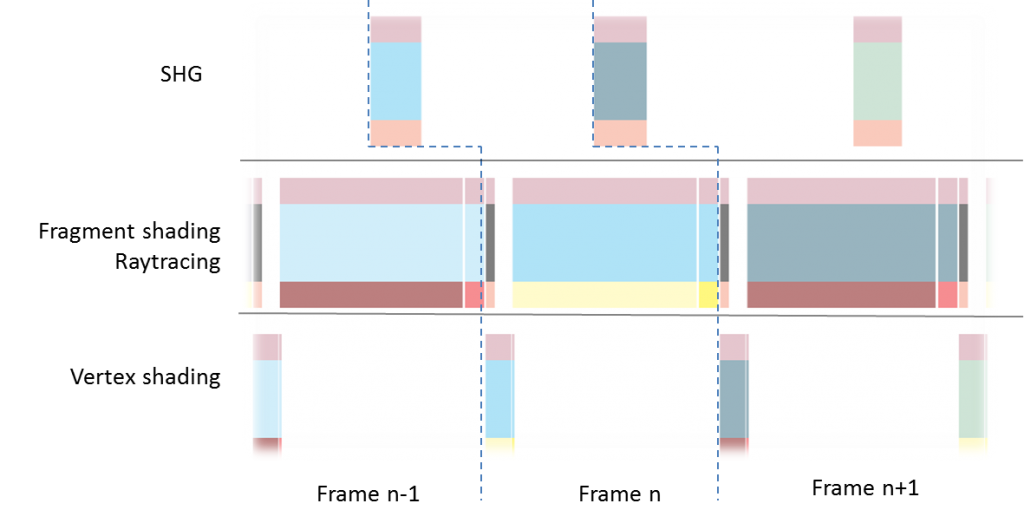
In the case of the Ray Factory demo, running the scene hierarchy generation in parallel reduced the frame time by about 8 ms, and our performance tuning application showed that we could have easily doubled the triangle count without impacting performance.
It is also possible to improve the performance Scene Hierarchy Generation stage further: the SHG for the static geometry can be pre-computed and cached at load time, and then merged at run-time with the dynamic elements. This is particularly useful as environments are usually mostly static.
Conclusion
The image quality of real-time 3D graphics can be greatly improved through the use of the PowerVR ray tracer: lighting effects can be made more precise (e.g. shadows, ambient occlusion), but more importantly, ray tracers can go beyond the limitations of current renderers by allowing brand new effects such as real-time global illumination. Finally, ray tracing not only allows better lighting effects, it also makes renderers a lot simpler by handling very graciously what would be complex corner cases for traditional engines.


