- 25 August 2014
- Imagination Technologies
This August, Seattle saw a flood of game developers coming into town for Unite 2014, the eighth annual Unity conference held at the Seattle Center. Among the exciting sessions and keynote speeches, Jens Fursund from our PowerVR Ray Tracing team was there to introduce the upcoming Unity 5 lightmap editor which uses our ray tracing technology to quickly and accurately simulate lighting.
We are very excited about our partnership with Unity and we’ve been getting a lot of positive feedback from select developers who have been able to see a demonstration of the tool at recent shows and events.
Let’s take a quick look at how PowerVR Ray Tracing technology speeds up work for developers and artists using the new lightmap editor.
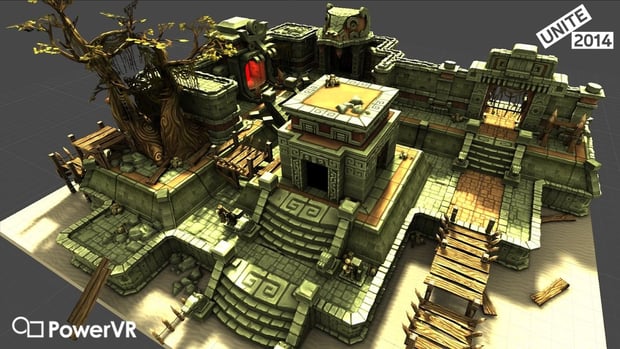 Unity 5 will show lightmaps interactively updating as you move geometry and lights around the scene or change materials
A preview of the Unity 5 lightmap editor
In the screenshots provided below, you can see how the Unity 5 editor re-renders the lightmap when the user changes any of the light sources. The tool is completely interactive and offers artists and developers an immediate idea of how lighting will look in the final game.
The engine driving the lightmap creation is our PowerVR Ray Tracing technology. The Unity 5 editor uses ray tracing to trace rays from the position of every lightmap texel, as it is mapped into the 3D scene. The rays then intersect the other objects, scatter off of them, and simulate all of the different paths that light can travel. The rendering process progressively improves over time until a final quality lightmap is rendered.
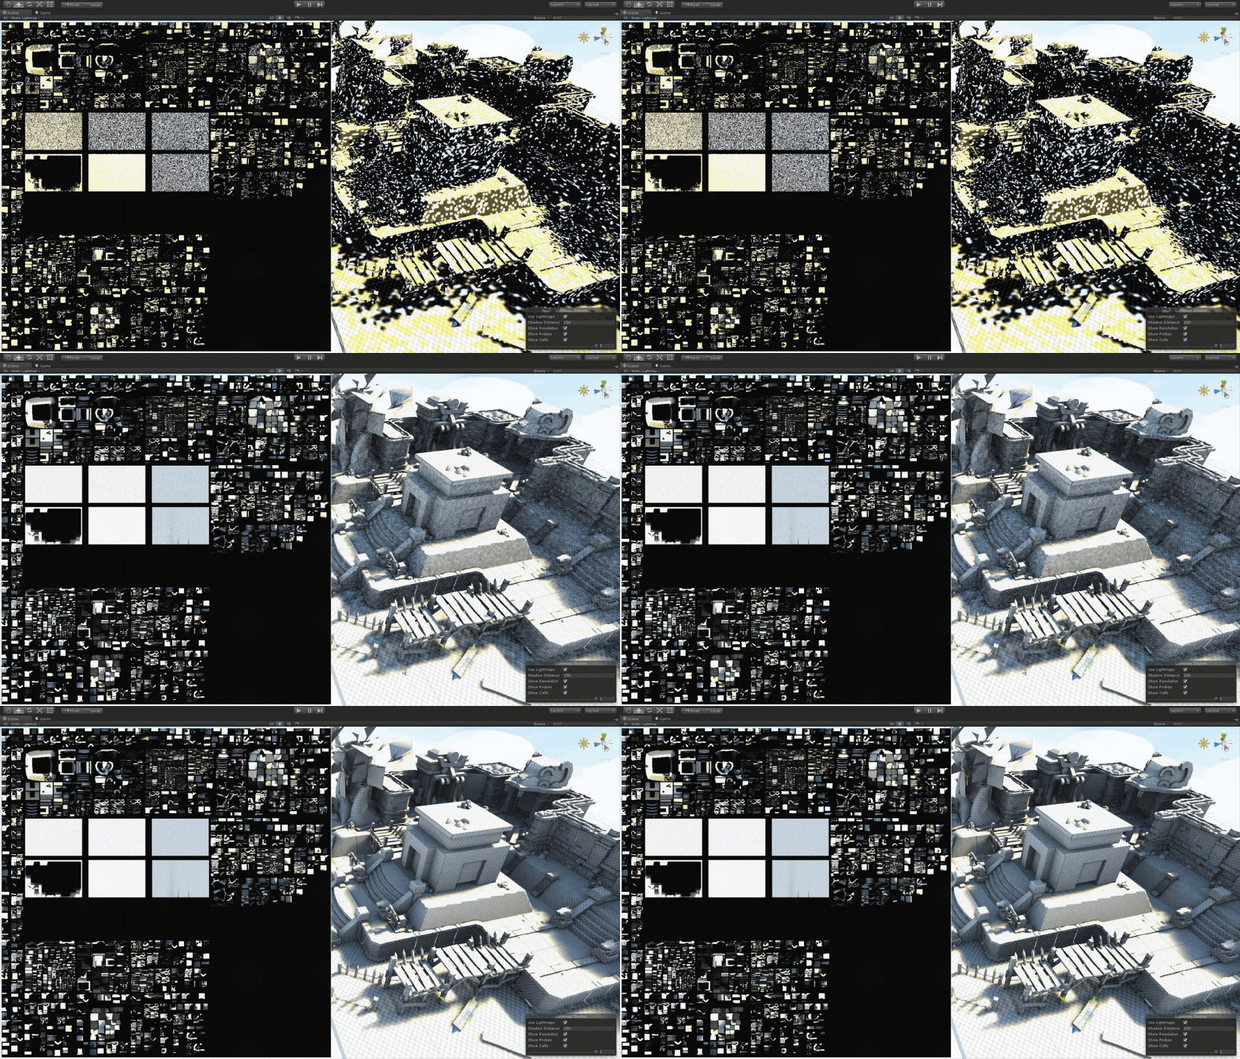 The sequence above shows how the lightmap is being progressively refined
You are free to make any changes that affect the lightmap, e.g. to lighting or geometry, and the editor will recreate the lightmap as needed. In our example you can see us moving objects around and adjust different material properties. For instance, when using a red emissive material on a given object, you can obtain a dramatic glowing effect as you increase the intensity of the color. However, this bouncing light effect is not something you will see only with emissive materials.
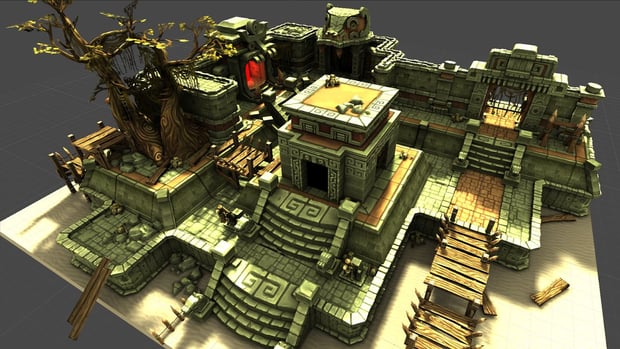 Red emissive materials generate glowing effects
When using a highly-saturated diffuse material (e.g. a green wall), the light will hit its surface and bounce on the other walls. Both examples are very noticeable in the static lightmap view.
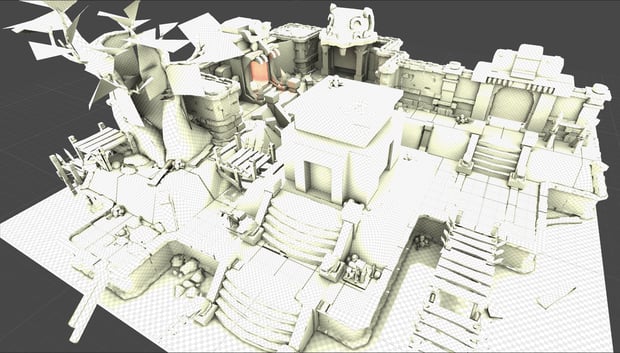 The effect of using an emissive material is more noticeable when switching to the static lightmap view
You can also modify variables related to the environment; for example, removing the skybox makes the shadows harsher while the bounce lighting is not getting washed by the skybox anymore.
In the image below, we’re also showing the textured view where textures are blended in with the lightmap overlay and the static lightmap view where you can see the pure lightmap, by itself. The static lightmap view is very useful when trying to figure out how the shadows and lighting in the scene will look irrespective of the textures applied on different objects. Additionally, you can enable a preview of the 2D unrolled lightmap in a small window, which can sit in the corner of the main editor.
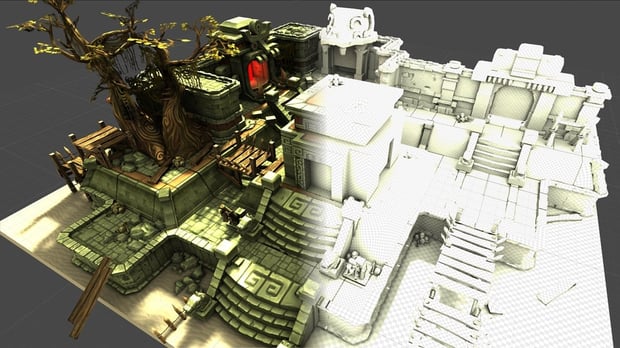 You can see the textures blended in with the lightmap overlay or switch to the static lightmap view
Make sure you follow us on Twitter (@ImaginationTech) to get the latest news and announcements for the PowerVR ecosystem.


